Skip to content
Facebook Instagram YouTube Email
  • Shopping Cart 0
    • No products in the cart.

Alisa Tilsner
  • About
  • Learn Card MakingExpand
    • What’s On: Classes, Events & Creative Experiences
    • Classes by MailExpand
      • Creative Card Makers Club
      • New Stampin’ Up! Monthly Card Club
      • Stampin Up Classes by Mail
      • Mid Month Mini Class
    • Shop TutorialsExpand
      • Creative Card Collection Tutorial
      • Card Making Tutorials
      • Class Kits
      • Colouring Classes
      • Paper Pumpkin Creatives
      • Stampin’ Down Under
      • My Account
      • Cart
    • Card InspirationExpand
      • Birthday Cards
      • Christmas Cards
      • Thank You Cards
      • Other Cards
      • Videos & Reels
    • Card Making TechniquesExpand
      • Blends Alcohol Ink
      • Colouring with Stampin Blends
      • Colouring with Stampin Up Inks
      • Embossing Techniques
      • Fancy Folds
      • Ink Blending
      • Other Card Making Techniques
    • Product Tips
  • Purchase Stampin’ Up!Expand
    • Current Stampin Up Specials
    • My Stampin’ Up! Store
    • Current Host Code
    • How to Place an Online Order
    • Australian Stampin’ Up! Catalogues
  • Join Stampin’ Up!
Alisa Tilsner
July 12, 2024July 12, 2024

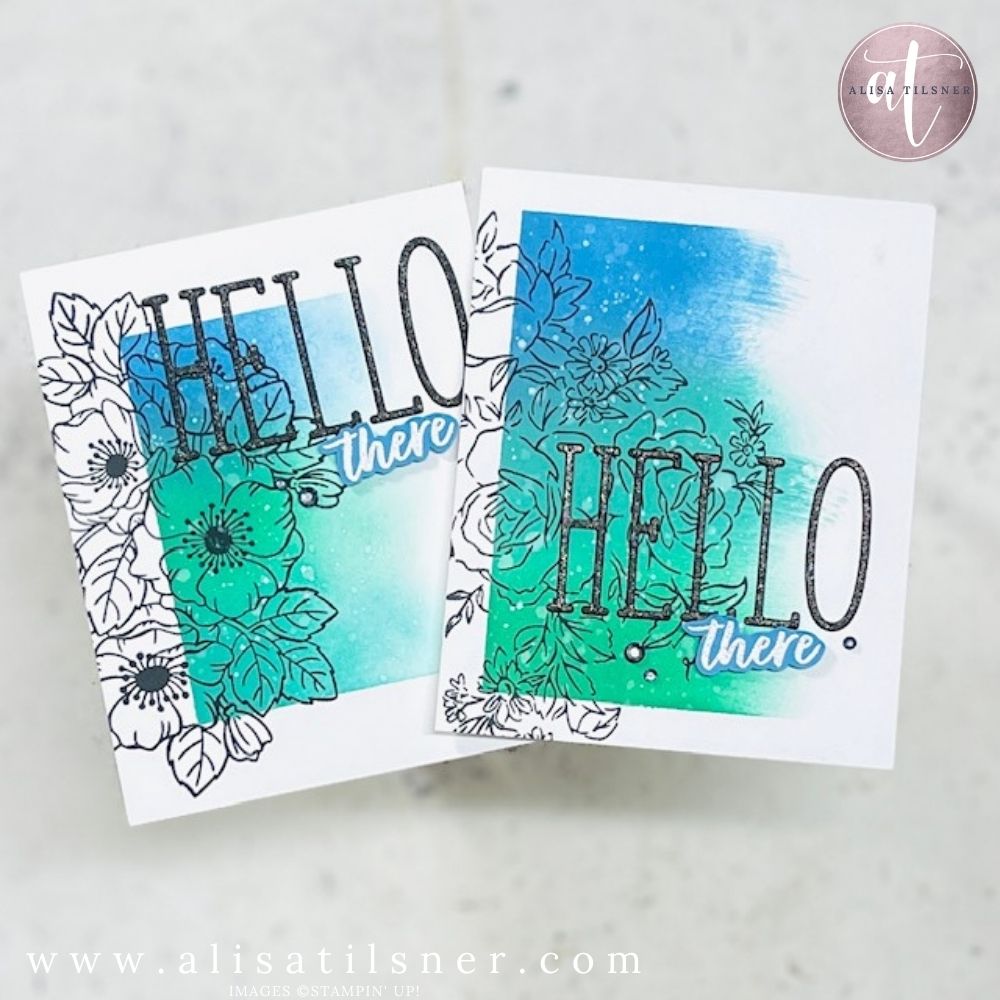
2 Cards Using Ink Blending

When I first started creating these cards, the only thing I had in my mind was the Ink Blending, and that I’d use the Layers of Beauty and the Enduring Beauty flower images because I knew they were nice and big.

I had thought I might use a small Happy Birthday stamp, but then I remembered that I’d just received some new Alphabet Dies, and being so thin, I then thought it would be the perfect time to pull out my Adhesive Sheets (which I ALWAYS forget I have)
Warning!! This post is going to be photo heavy!!

If you’ve not used Adhesive Sheets before, I can tell you, it’s super easy and makes working with thin delicate pieces so much cleaner than liquid glue.
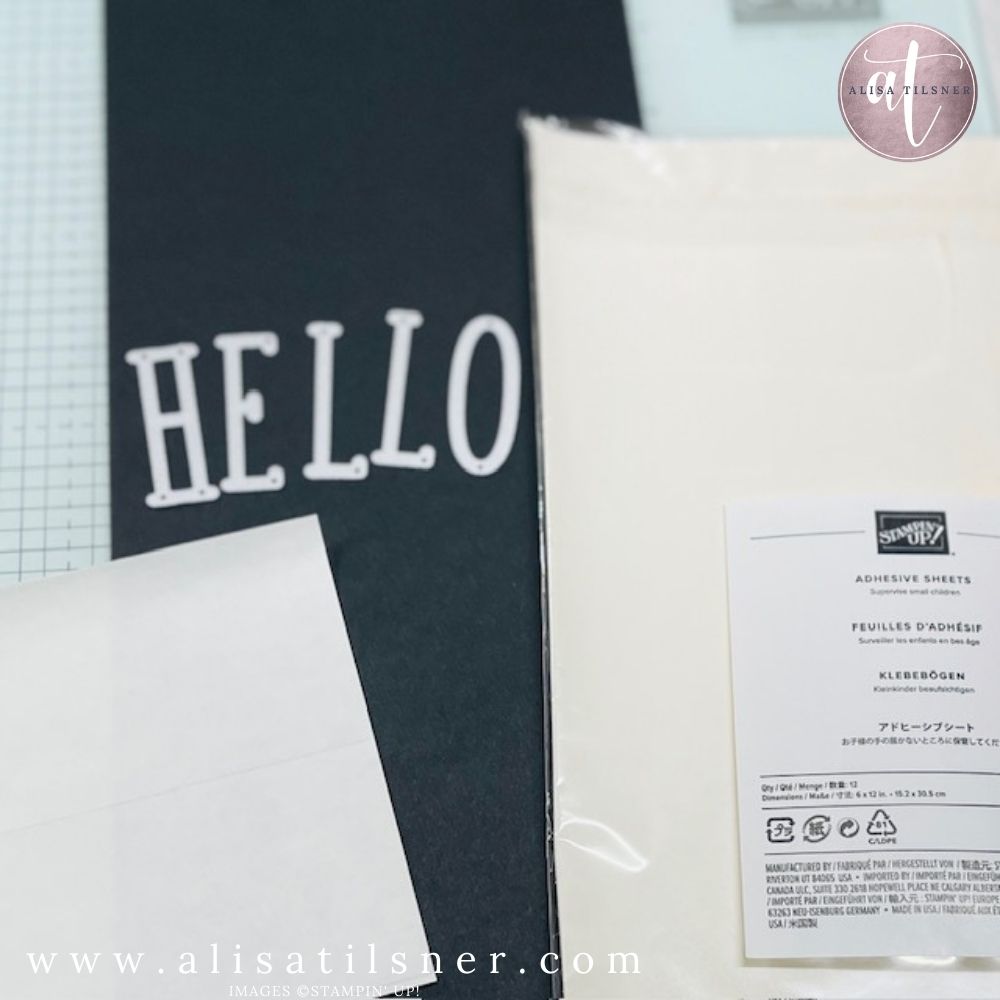
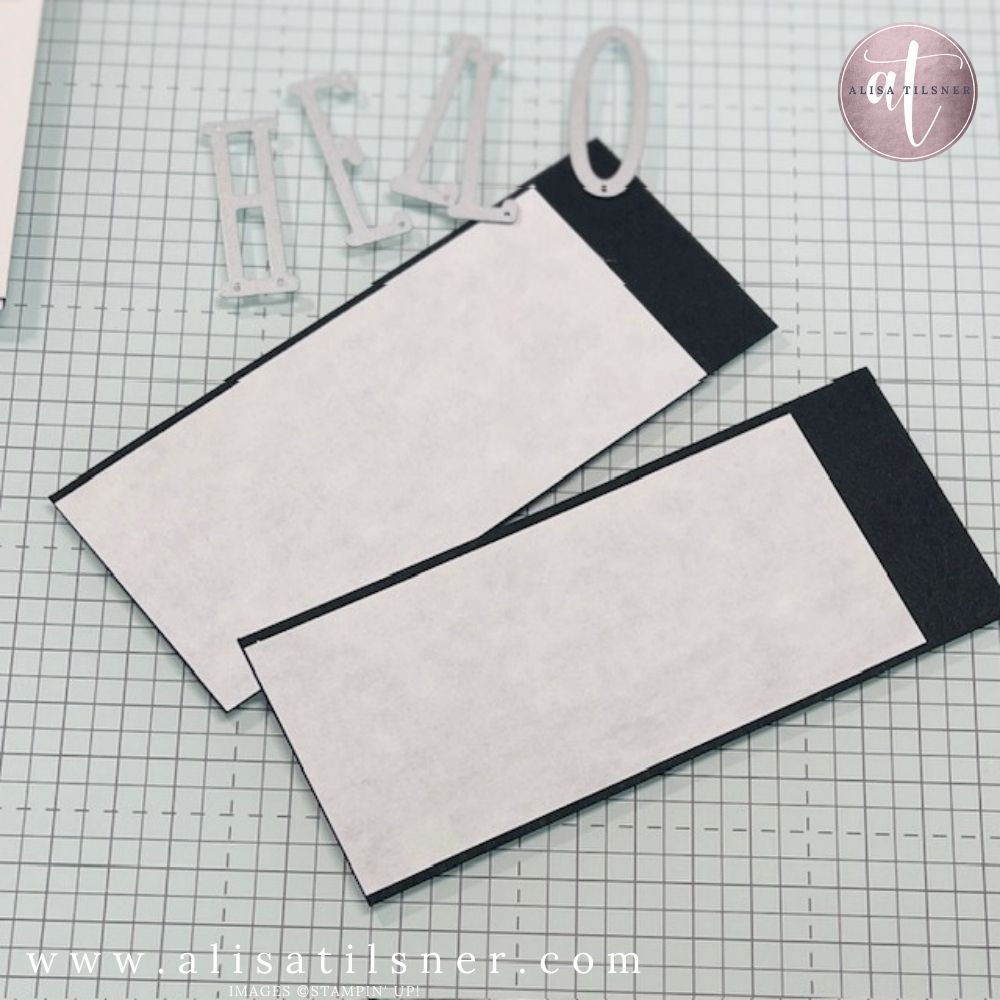
The Adhesive Sheets are a double sided sheet of stickiness!! Peel off one side and adhere it to your card stock, or the back side of pattern paper if you’re using that.
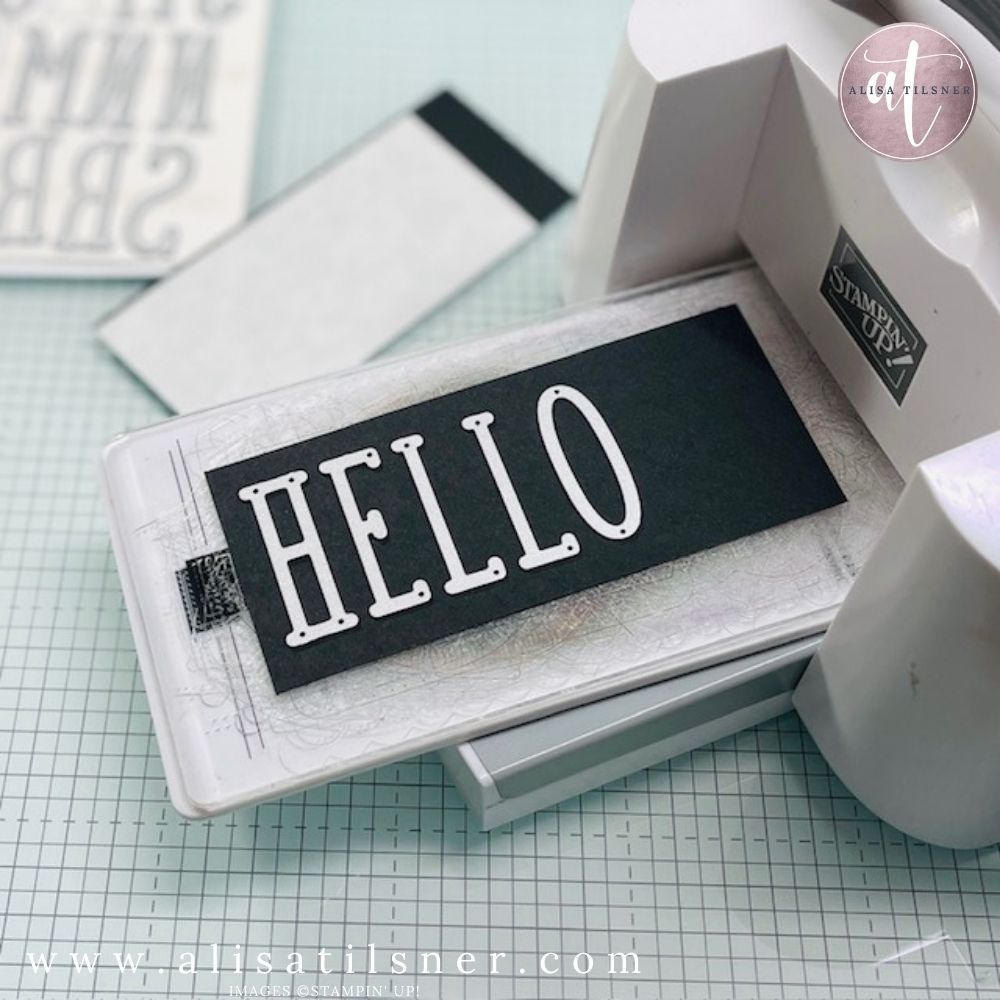
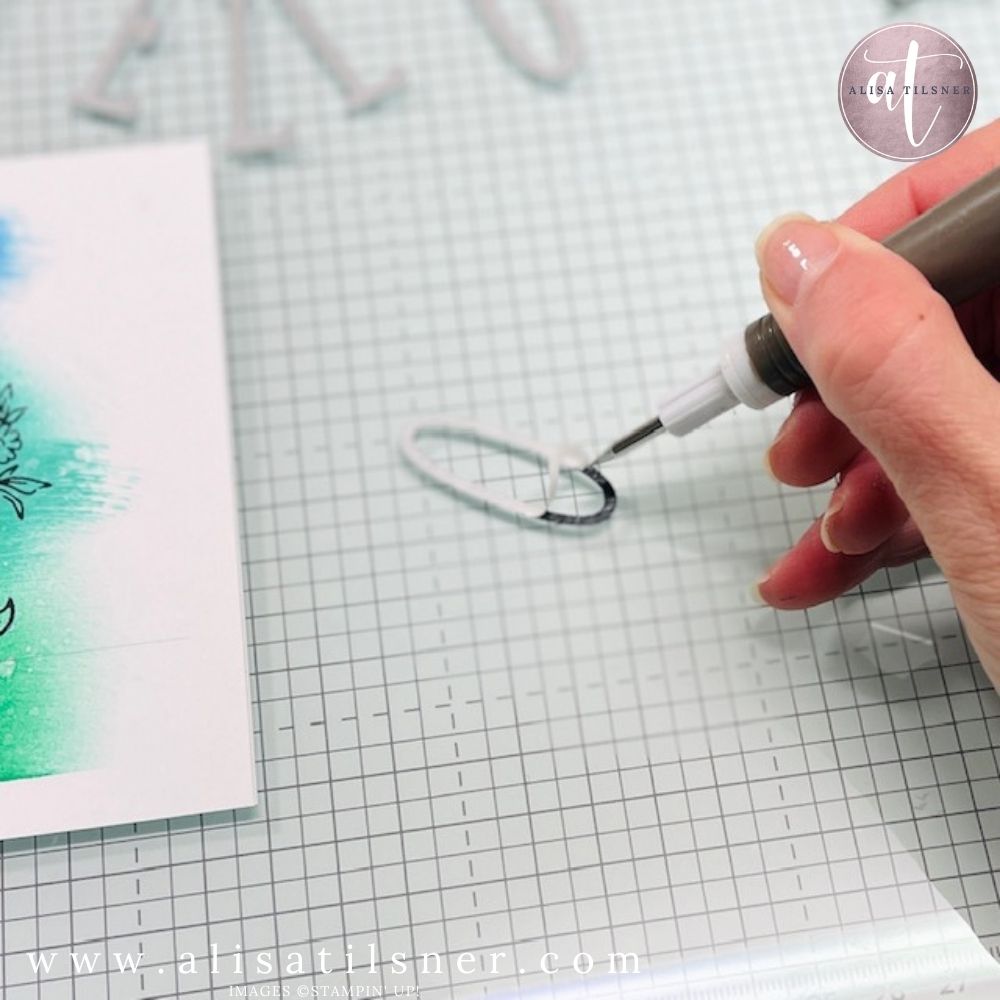
Flip the card over and die cut your shapes. Here, I’ve used the Alphabet a la Mode Dies which are quite thin. I then use my Take Your Pick tool to remove the backing layer on the sheets.
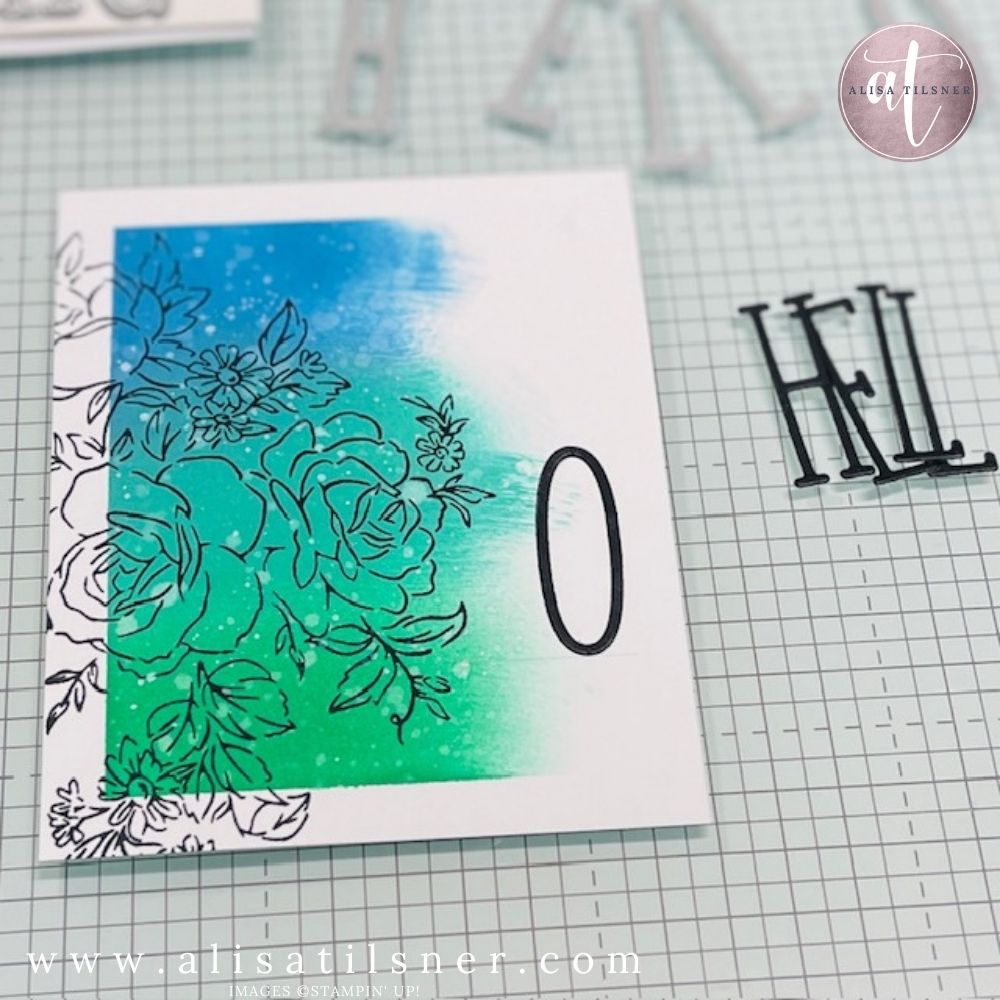
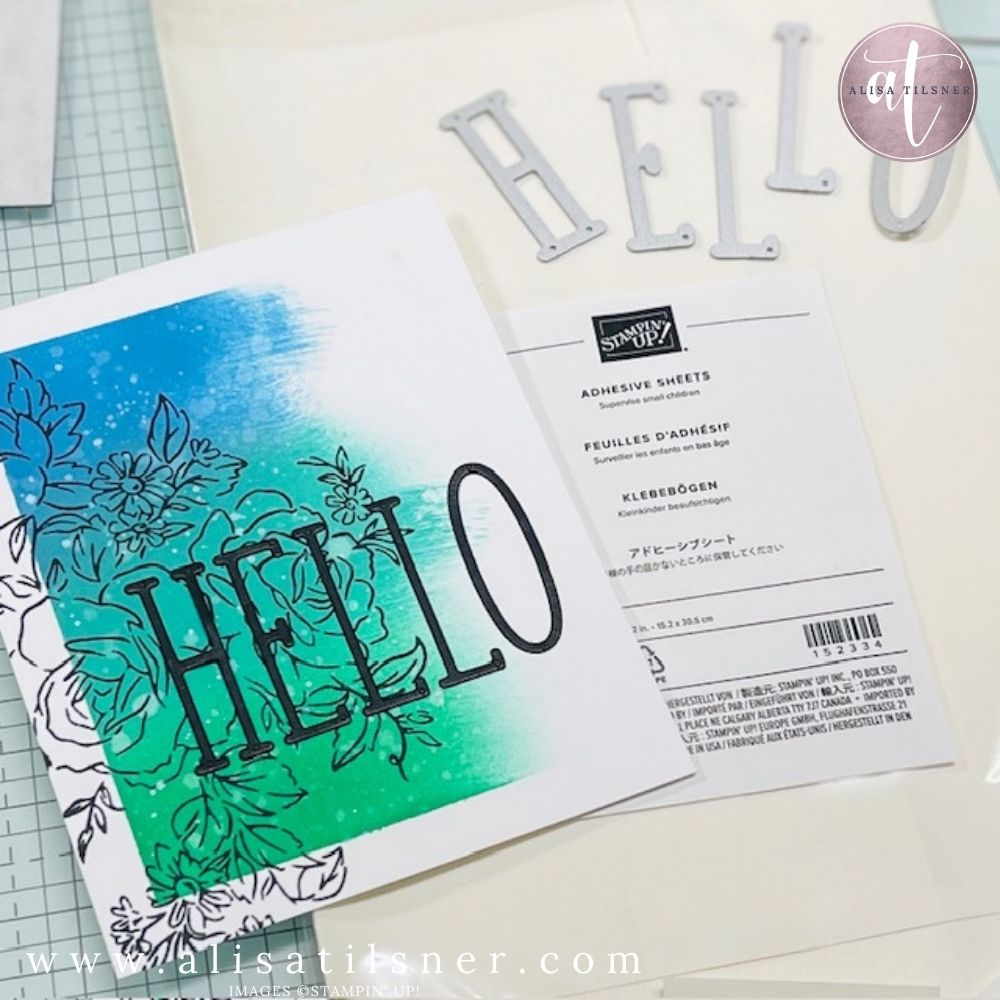
Then simply adhere your die cuts to your card front. To help me line up the Letters, I drew a pencil line on my card, then erased it after the letters were placed.
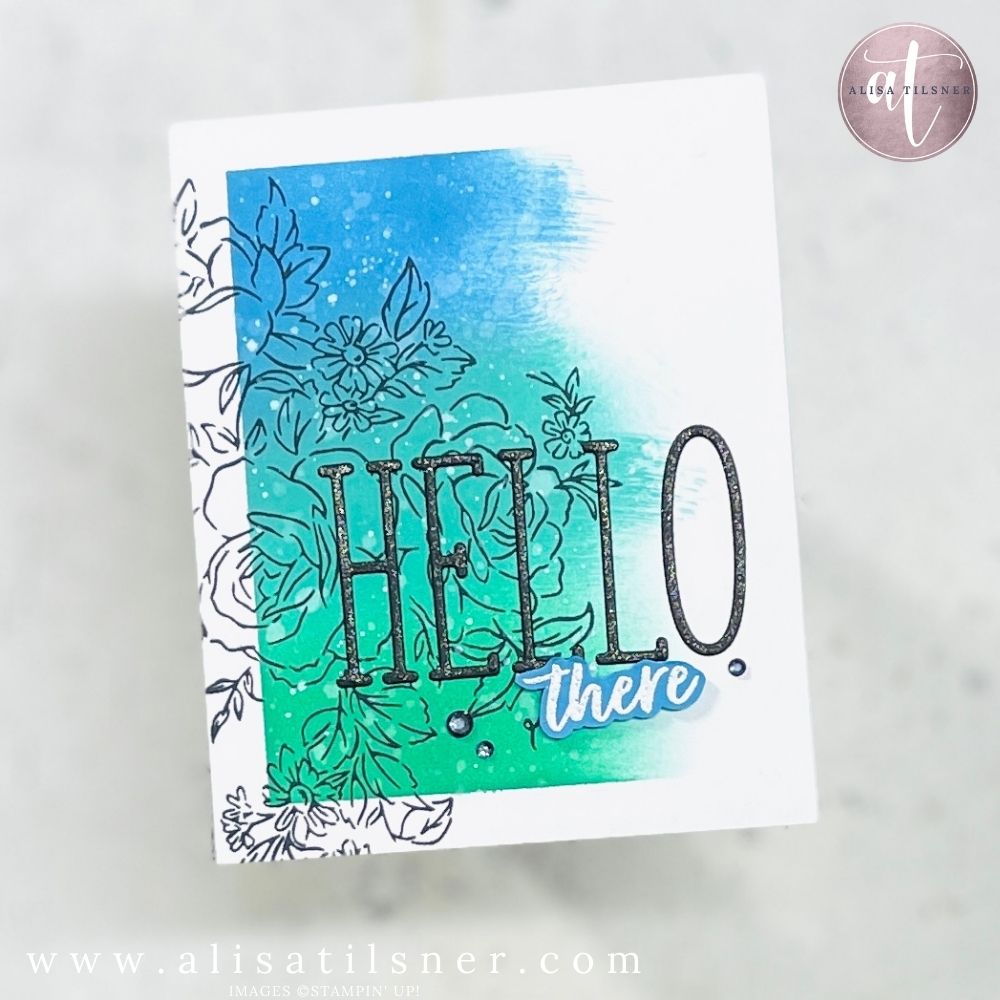
Back to the Card – the colours I used for the two card are Azure Afternoon, Summer Splash and Shy Shamrock. Here’s a few more tips on the masking process.
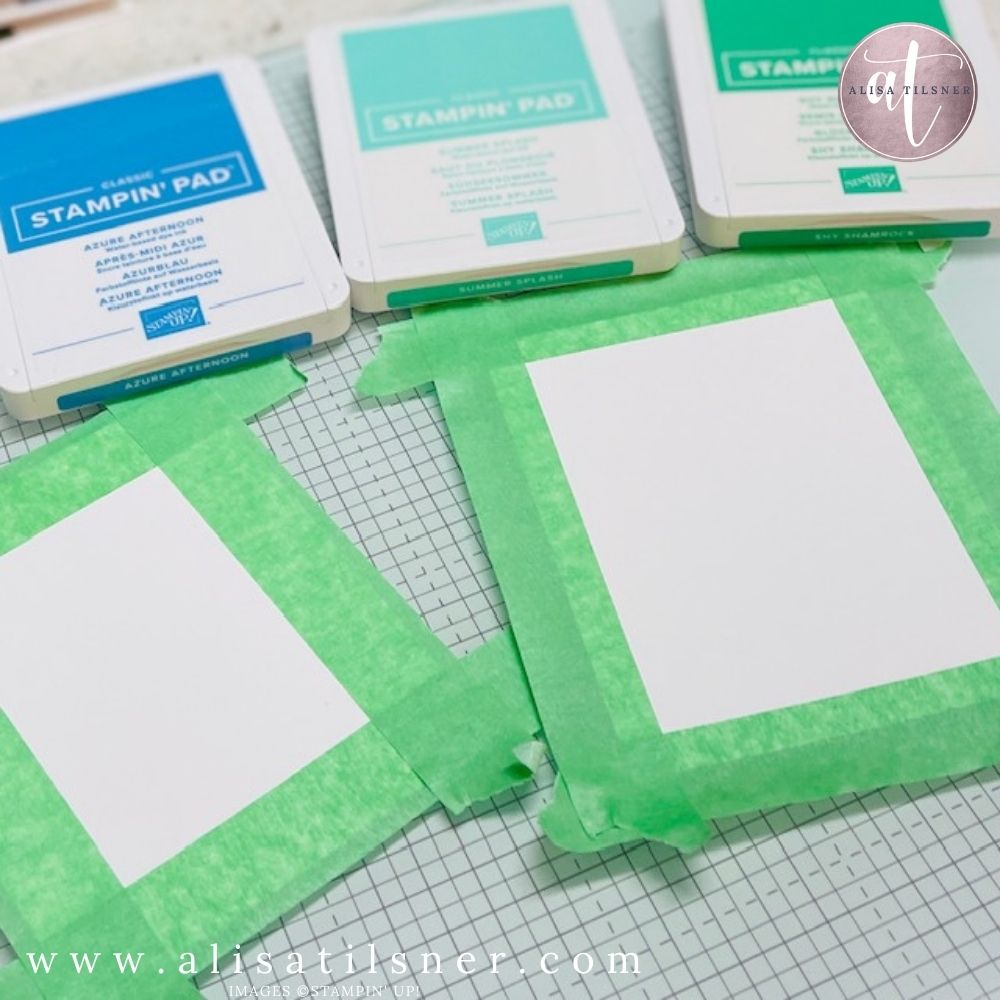
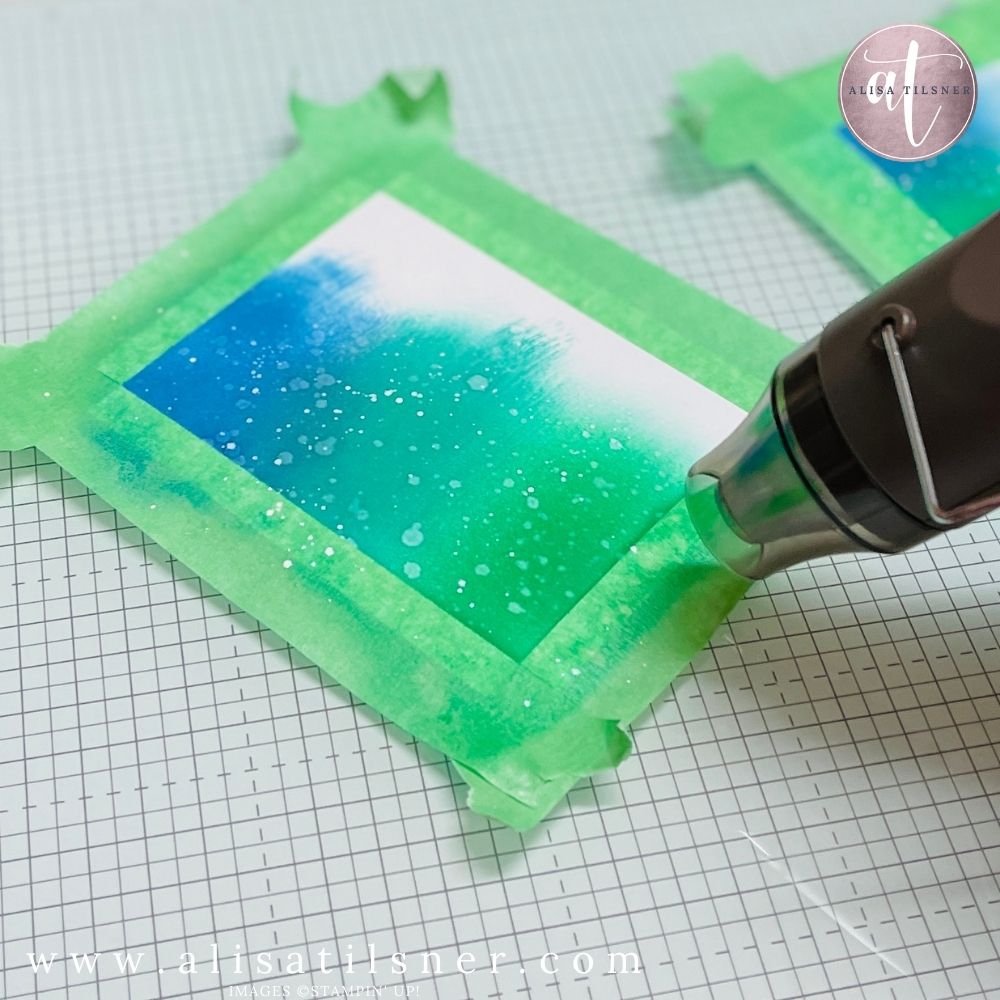
I used Green Painters Tap for my masking. One card I placed the tape 2cm in all the way around, the other card, I placed it 1cm around. The Glass Mat makes it so easy to get it lined up straight.

I then applied the ink with my Blending Brushes. Flicked some Water over the top, then also flicked some White Ink over the top. Watch out for that White Ink, it ends up flicking everywhere!!

Now, I always manage to tear my card when I try to remove the painters tape, but a little tip to help prevent this is to heat the tape before you start removing it. The heat helps the sticky to be less sticky!!

I pulled out my retired Stamparatus to stamp the floral images, this way I could get a nice black image. But ….. ugh!! My magnet had some black ink on it, gah!! Probably because I’m lazy at cleaning up and it was on there from last use. Anyway, it transferred to my card. Doh!
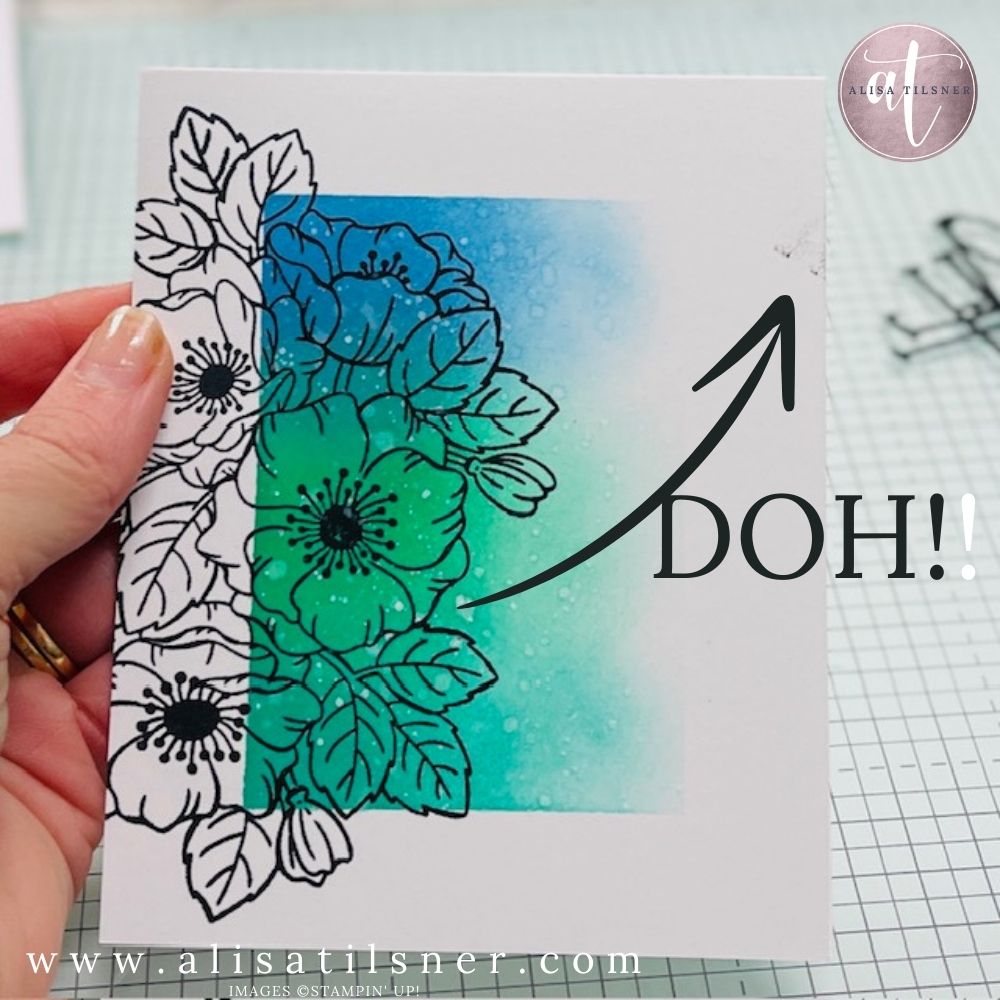
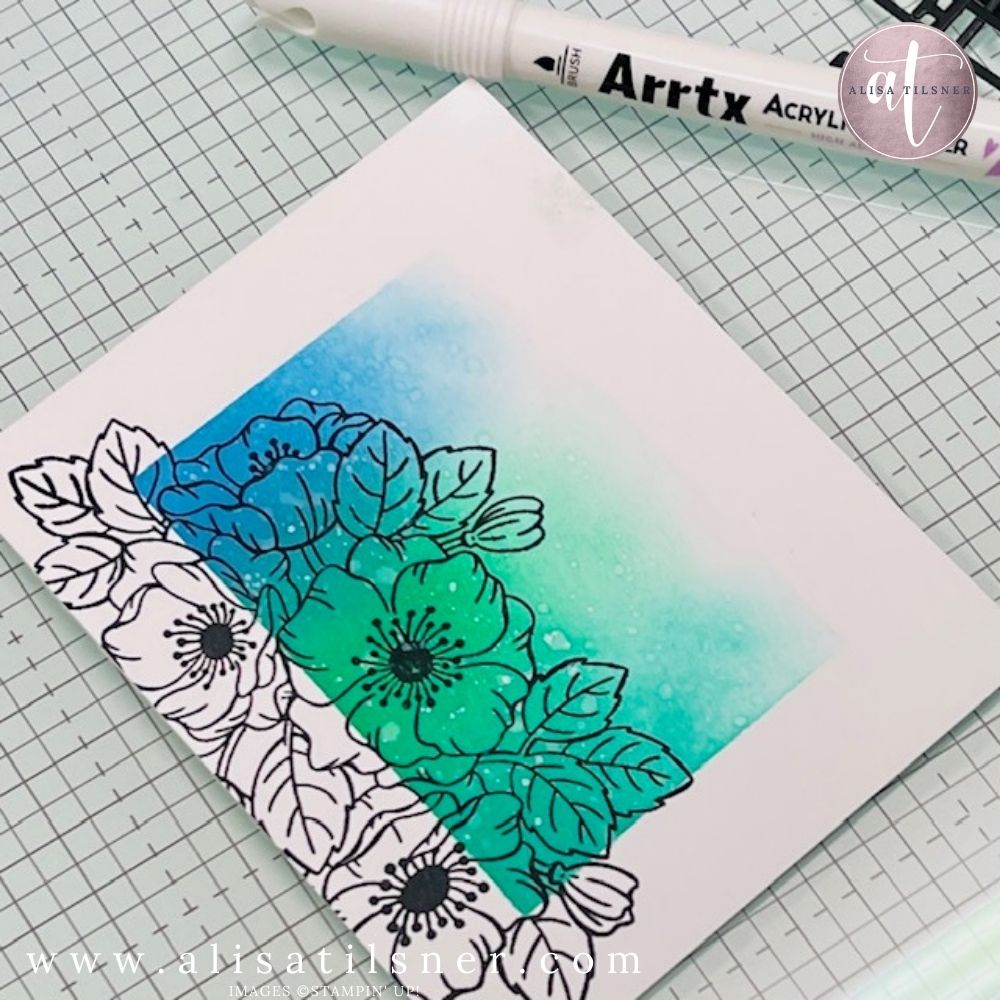
I honestly had no clue as to how I was going to disguise that! I did how take a chance and pull out my White Acrylic Marker and paint over the top of the black. It’s not perfect and you can still slightly see it, but I think you’d have to look hard for it now.
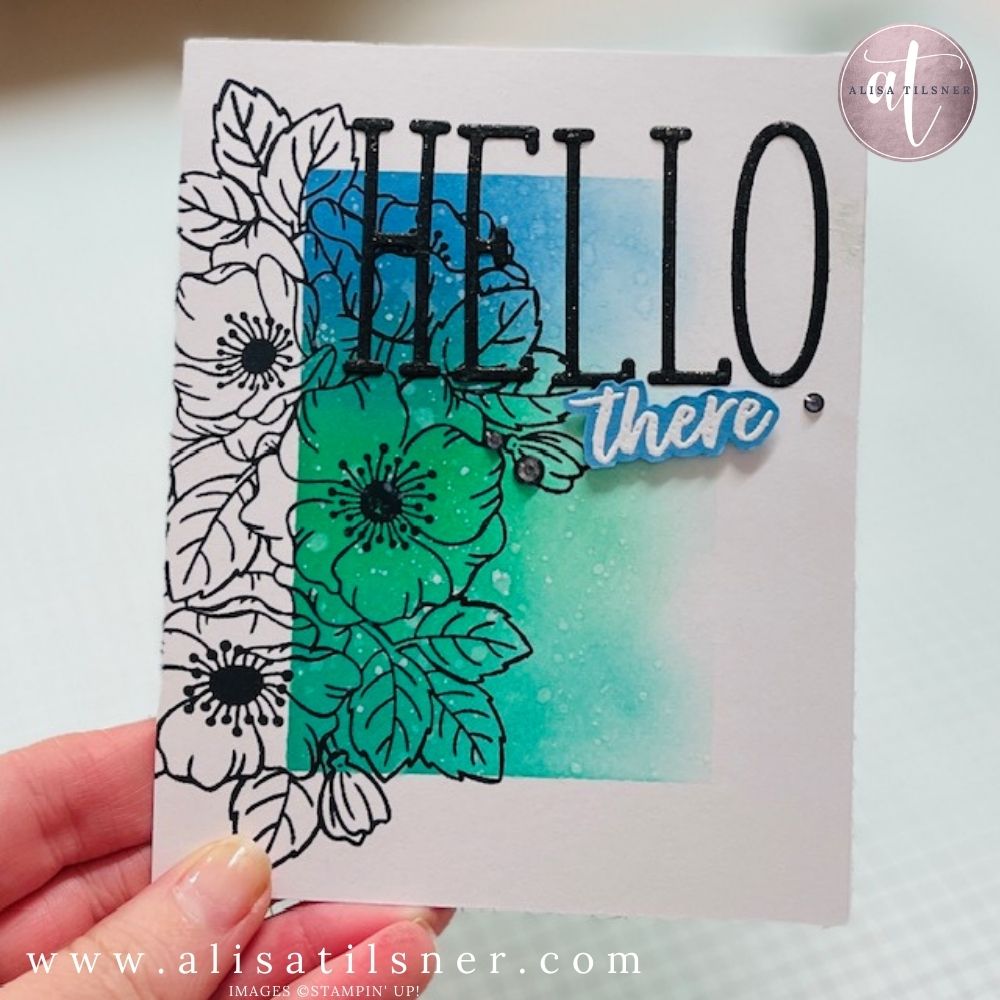
Anyway… I finished off my cards with a little Wink of Stella on the letters. And I also coloured some Rhinestones with my Black Blends (you could use a black sharpie).

Now I’m keen to create more with different colour blends. What colours would you try for a card like this?

Here’s the supply list for these two cards.

If you need a little more inspiration for Ink Blending, I have a whole heap of other cards you might be interested in.

If you decide to purchase any of your supplies from me, Thank You. Don’t forget to use the code below to receive a thank you gift from me. If you’ve not ordered before, I have a tutorial to help you.
Cheers for now

Alisa
  • Shop my ONLINE STORE
  • Join The Artful Stampers Team – Happy Shoppers, Hobbiest, Part Time and Full Time welcome!
  • Creative Card Makers Club
  • Watch me on YouTube
  • Socialise with me on FaceBook
  • Email Me

Sharing is caring!

28 shares
  • Share
  • Tweet

Get Instant Access to The Freebie Library

Search

Image Credit

All images copyright Stampin’ Up! 1990-2026 unless otherwise stated. All artwork created by Alisa Tilsner. This website is protected by intellectual copyright. Cards and other items on this website are for your inspiration and personal use only, not for submission to magazines or competitions. Thank you for your honesty. All content is the sole responsibility of Alisa Tilsner, Independent Stampin’ Up!® Demonstrator and the use of and content of the classes, services, and products offered on this web site is not endorsed by Stampin’ Up!®

I decided to play along with the Global Design Pro I decided to play along with the Global Design Project Challenge this week. Casing the amazing Kim Fee.
I've used the new Lily of the Valley Bundle, which is going to be the theme for my Creative Card Makers Club class for June.
#gdp548 #stampinup #stampinupaustralia #cardmaking
How's this for a fun Shaker Card for the younger m How's this for a fun Shaker Card for the younger men in your life?
I love all the texture and shapes in it, AND the colour combo!
What do you think of this colour combo? BlackBerry What do you think of this colour combo?
BlackBerry Bliss, Pumpkin Pie and Crushed Curry!
Can't say I enjoyed this Challenge LOL!! But, it i Can't say I enjoyed this Challenge LOL!! But, it is a challenge and it is meant to challenge you!
Colour Inkspiration Challenge 209  #ci209 
Make sure you're in the Facebook Group so you can add your entry, you never know, you might become a guest designer!

#stampinupaustralia #cardmaking @colourinkspirationchallenges  @stampinupofficial
I decided to something I’ve not thought of before. I decided to something I’ve not thought of before.  Tone on Tone Ink Smooshing.
I’ve done it plenty of times on White Card, but never with the same colour card as the ink I’m using. 
If you haven’t tried Ink Smooshing before, here’s how you do it.
A couple of ink drops on your glass mat. Spritz with a little water. Smoosh your card into the inky puddle, lifting it up and repositioning it. That’s it, super easy.
The last 2 photos are of my card wet and then dry. 
Tone on Tone Ink Smooshing results in a very soft looking texture.  Love it!

#stampinup #stampinupaustralia #cardmaking #inksmooshing
Thinking of joining Stampin' Up!? During May you'l Thinking of joining Stampin' Up!? During May you'll get all 5 Brand New InColor Inkpads (the new magnetic style) in your Starter Kit. 
That's a value of $112.50.
PLUS later this month, we start preorder for the July Online Exclusives products, you'll be able to get product early :)
If you have questions, please feel free to reach out to me, or if you know you want to join, I'll put my link in the comments.
Follow on Instagram
Contact Alisa

All images copyright Stampin’ Up! 1990-2026 unless otherwise stated. All artwork created by Alisa Tilsner. This website is protected by intellectual copyright. Cards and other items on this website are for your inspiration and personal use only, not for submission to magazines or competitions. Thank you for your honesty. All content is the sole responsibility of Alisa Tilsner, Independent Stampin’ Up!® Demonstrator and the use of and content of the classes, services, and products offered on this web site is not endorsed by Stampin’ Up!®

© 2026 Alisa Tilsner • Refined theme by Restored 316

Ink Blending
  • About
  • Learn Card Making
    • What’s On: Classes, Events & Creative Experiences
    • Classes by Mail
      • Creative Card Makers Club
      • New Stampin’ Up! Monthly Card Club
      • Stampin Up Classes by Mail
      • Mid Month Mini Class
    • Shop Tutorials
      • Creative Card Collection Tutorial
      • Card Making Tutorials
      • Class Kits
      • Colouring Classes
      • Paper Pumpkin Creatives
      • Stampin’ Down Under
      • My Account
      • Cart
    • Card Inspiration
      • Birthday Cards
      • Christmas Cards
      • Thank You Cards
      • Other Cards
      • Videos & Reels
    • Card Making Techniques
      • Blends Alcohol Ink
      • Colouring with Stampin Blends
      • Colouring with Stampin Up Inks
      • Embossing Techniques
      • Fancy Folds
      • Ink Blending
      • Other Card Making Techniques
    • Product Tips
  • Purchase Stampin’ Up!
    • Current Stampin Up Specials
    • My Stampin’ Up! Store
    • Current Host Code
    • How to Place an Online Order
    • Australian Stampin’ Up! Catalogues
  • Join Stampin’ Up!
Search