
Faux Suede
Last week we held a team cyberstamp in our training forum. Â One of the challenges I set was to create a card using the technique Faux Suede, something that I had always wanted to try but never got around to.
Here’s my card, which we also made a Linc n Learn this week.
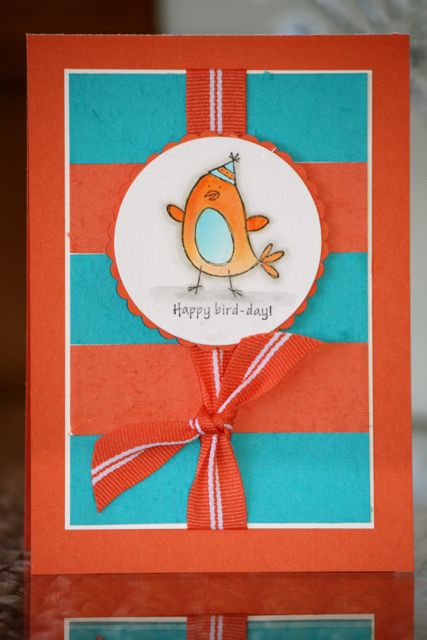
Nice and bright huh! Â The suede is made by curling the cardstock between your thumb and bone folder. Â The breaks the fibres in the card, keep working the card until it begins to split. Â Gently peel the layers of card apart.
The result is a very touchy feely card.
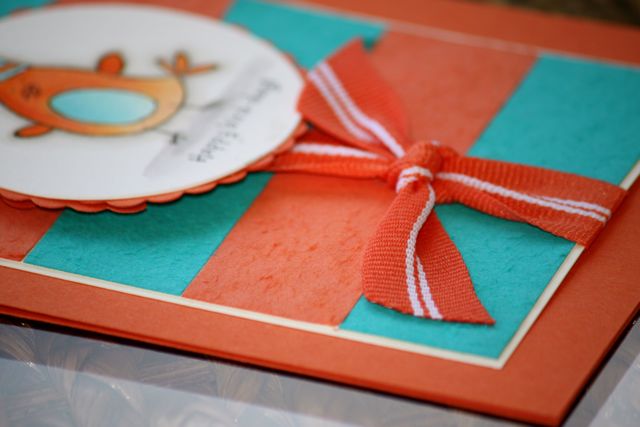
The other thing I wanted to point out is the scallops behind the circle.
Can you guess how this is done? Â The first person to guess correctly will receive a little something from me, (Australia only please). Â I’ll give you a couple of days!
Hi Alisa, Must try this technique! I think you have used your Autumn Mini preview product, the Big Shot Scallop Die that is being released next month.
Thanks Liz
Hi Alisa…..I love the colours you’ve combined here!! They really work well together and I’m definitely going to give your ‘suedeing’ technique a go.
I think that you’ve used several scallop oval pieces to create the scalloped circle you have behind the focal image. And I really, really like the effect. 🙂
xxx
Hi Alisa, I think you have used the scallop oval punch and layered it underneath the large circle. Love the suede effect too! Will have to try that one 🙂
Hi Alisa, gorgeous card! I’ll have to try the technique myself now. I think you made the scalloped circle the way Richelle has described in a previous post (which I may try myself in a moment). Failing that maybe you started with a scalloped circle/s punched from coloured cardstock and then made a few layers in the same way as the faux suede method and lined up the layers (whole or part circles) behind the white punched circle.
I think you have used the Scallop Square punch and angled each square around to achieve the border. I will have to give the suede technique a try. It looks really effective.
Love this technique…..one of my favourites to create that shabby chic look. Gorgeous card Alisaxxx
Hi Alisa,
I think you have made the scalloped edge the way I did an oval just the other day…. With a really skinny strip of card that’s been scalloped with the scallop border punch and then adhered to the back of your white circle.
Thanks for sharing your card, its a great colour combo! I will have to try it!!!
Hi Alisa, seen this faux suede technique in a few of my internet haunts recently so must try it myself. In relation to your scallop edge I think you have punched a few Scallop Circles and cut them in quartes and then simply adhered them to the edge of your circle so they line up around the edge, maybe needing to overlap a couple for actual alignment. Love the bright colours on this card, TFS!
i think it’s the scallop oval punch cut in half….LOVE the card too. I’m celebrating in May!! wink wink!! xo
I think you’ve punched some scallop circles, then punched a hole in the middle and snipped from the middle towards the scallops, then stuck it down along the edge, pulling it apart as you go.
Great card, by the way!
Hi Alisa, I think you have used the scallop border punch on a long thin piece of cardstock, then “nicked” with scissors at the thinest part of each scallop from the sraight edge side (but not all the way through) then bent the cardstock around. this lets you make any sized circle! and you can even make other shapes! Hm I’m not very good at explaining am I?!?
it looks like you’ve layered some scallop circle punches maybe?