Delicate Pines Spotlight: Cling Wrap Texture + Bright Snowflakes
If you love simple cards with a striking focal point, today’s project is for you. In my 25 September Thursday Live I revisited the cling wrap lifting technique and paired it with the Stampin Up Delicate Pines Bundle for a clean, modern Christmas card that still feels wonderfully detailed. Think airy snowflakes made from pine sprigs, layered over an icy, textured sky—perfect for mass-making without sacrificing style.

Why the Stampin Up Delicate Pines bundle?
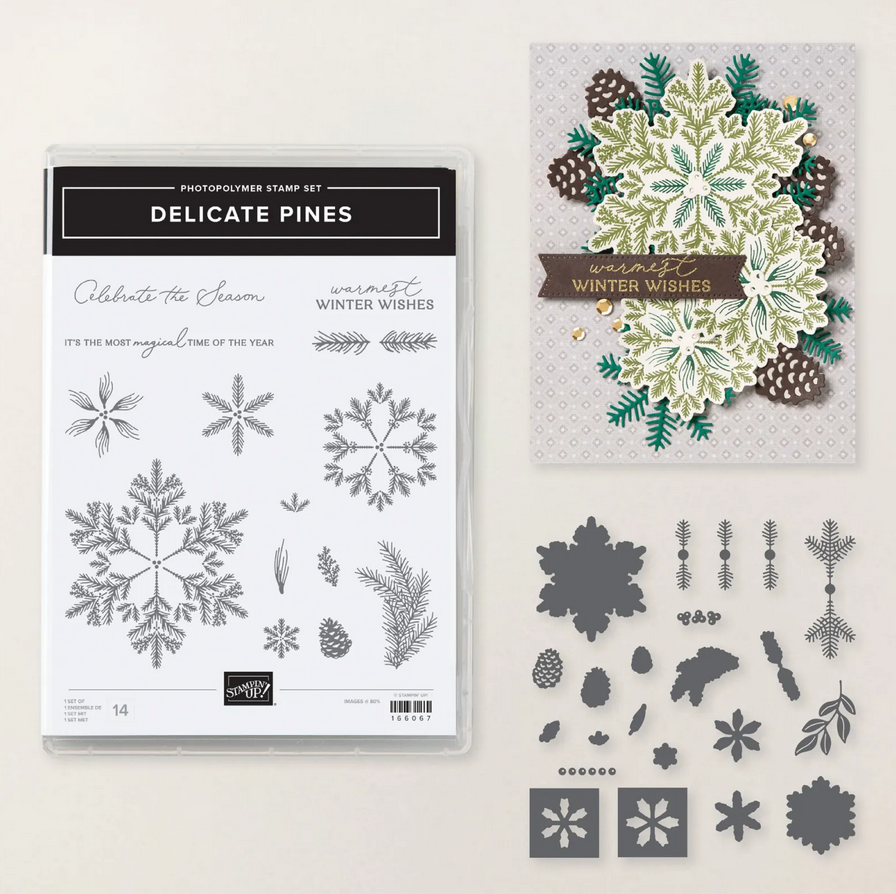
The Delicate Pines stamp set features intricate “twiggy” snowflakes that nest into one another, plus coordinating dies that let you mix, match, and layer. You can cut full images, build dimensional flakes from components, or pop out centres for extra detail. It’s far more versatile than a standard snowflake set—wreaths, backgrounds, elegant tags, even winter birthday cards are all in play. If you’re after one bundle that looks luxe with minimal effort, this is it.
The Technique: Cling Wrap Lifting
This background is wonderfully fast and forgiving—every piece looks unique.
Steps
- Ink-blend a panel of Basic White with Balmy Blue. Don’t stress about smoothness—the texture is the point.
- Wet scrunched up Cling Wrap, hold and release in a few spots to “lift” colour. You’ll see soft veining and frosty patches appear.
- Heat set thoroughly. (Important so your next layer stamps cleanly.)
The result is an icy wash with organic texture that reads as winter sky without overwhelming your focal images.
Colour Choice That Pops
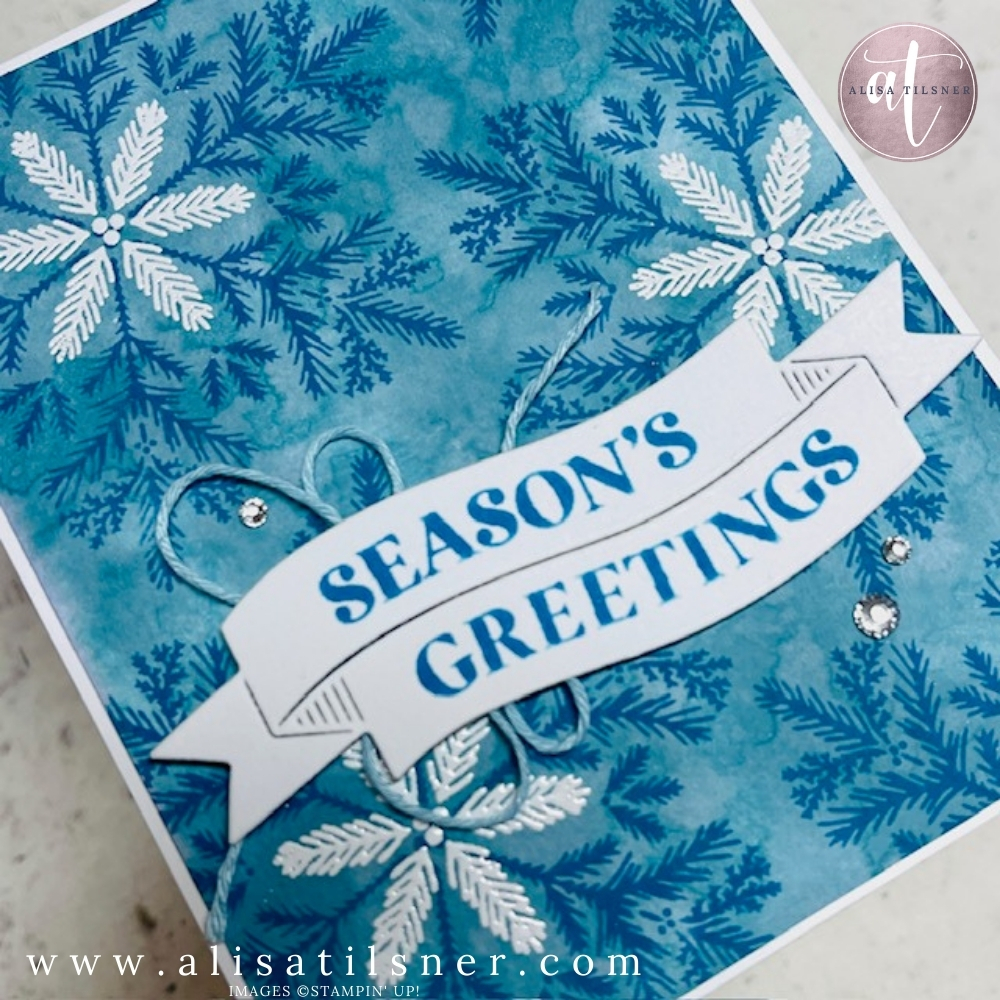
For the large snowflakes I stamped in Azure Afternoon—a brighter, clearer blue that lifts beautifully off Balmy Blue. For the centres, I chose white heat embossing. It brightens the design, preserves the delicate line work and keeps the card fresh and light. Tip: Use the Embossing Additions Tool Kit (anti-static) before stamping with VersaMark so your white powder only sticks where it should.
Composition Made Easy
A quick layout rule: stamp in triangles. Place three large flakes in a loose triangular arrangement, letting the tips “interlock” so you avoid awkward overlaps. Partial images peeking from edges make the panel look intentional and full.
Finish with a bold sentiment using a long label die (I used a favourite ribbon style label), then tuck a few neat loops of Baker’s Twine behind for softness. Rhinestones add sparkle without hiding that delicate embossing.
Make It Your Own
- Metallic moment: Try silver embossing for the centres (or whole flakes) for instant elegance.
- Colour swap: Soft pools in Pool Party or dramatic dusk tones in Night of Navy both work. Keep the embossed centres light for contrast.
- Batch-making tip: Prep multiple ink-blended panels at once. Do all your embossing in one pass, then assemble while you watch a festive film.
Shopping List (quick glance)
- Delicate Pines Bundle (stamps + dies)
- Inks: Balmy Blue (blend), Azure Afternoon (flakes), VersaMark (centres)
- White Embossing Powder + heat tool
- Basic White card, long label die, adhesives, Baker’s Twine, Rhinestones
- Cling wrap + paper towel (from your kitchen)
Ready to Craft?
The Stampin Up Delicate Pines Bundle is a brilliant addition to your Christmas crafting—clean lines, effortless layering, and plenty of looks from one set. Add the coordinating Designer Series Paper, ribbon and stars from the suite for quick coordinated gifts and tags, too.
If you’d like the written instructions for this card (and over a hundred more), join my email list to access my Freebie Library. When you’re ready to shop, you can find Delicate Pines and all supplies in my online store—pop the bundle into your basket and you’ll be set for a season of beautiful, easy Christmas cards.
Cheers for now

- Shop my ONLINE STORE
- Join The Artful Stampers Team – Happy Shoppers,
Hobbiest , Part Time and Full Time welcome! - Creative Card Makers Club
- Watch me on YouTube
- Socialise with me on FaceBook
- Email Me